


Product
Templates
Resources
Company
Home
Blog
Tutorials
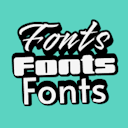
Generate Retro Wavy Text: A How-To Guide
Generate Retro Wavy Text: A How-To Guide

If you're a fan of the wavy text effect, you’ve probably seen the popular method of stacking multiple copies of the same text on top of each other. This technique gives a fun and groovy vibe to your designs, reminiscent of retro styles. This article will walk you through the easy steps to create stacked wavy text to elevate your designs.
Table of Contents
How to Easily Generate Wavy Text Effects
Kittl provides an intuitive tool that does the hard work for you. With its wavy text generator, you can create wavy text in just a few clicks. This automatic wavy text generator helps keep curves smooth and uniform. The tool allows for precise control of how you want the waves to flow, offering a more professional and polished look compared to manually creating a wavy text effect.
But it's flexible as well, meaning you're still able to adjust the wave intensity and make the wavy font as bold or subtle as you like. So you'll always end up with a unique result customized to your preferances.
Kittl allows you to accomplish this in just a few steps that we've broken down below.
Why Stacked Retro Wavy Text?
The retro wavy text generator in Kittl allows you to create that groovy, psychedelic style that’s making a big comeback in design trends. You can mix this effect with other elements to create bold, stand-out graphics perfect for posters, social media, and even branding.
Why Use Kittl for Your Wavy Text Designs?
Kittl is a user-friendly design platform that makes it super simple to create stunning graphics. Whether you’re a beginner or a seasoned designer, Kittl offers a seamless experience with plenty of tools that give you professional results. One of the innovative features is its easy-to-use text effects. Kittl's text effects enable you to transform basic text into eye-catching, professional quality designs. And the best part? It only takes a few clicks.
The retro wavy text generator in Kittl allows you to create that groovy, psychedelic style that’s making a big comeback in design trends. You can mix this effect with other elements to create bold, stand-out graphics perfect for posters, social media, and even branding.
How to Make Wavy Text in Kittl: The Step-by-Step Process
If you’re new to Kittl and want to create a retro wavy text effect, follow this detailed guide to get started. We’ll break down each step using insights from the video tutorial and explain how to maximize Kittl’s features to achieve a smooth and professional wavy font design.
Getting Started
To get started creating your wavy text design, head over to Kittl and create a new project. Don't have an account yet? No problem - you can quickly create an account for free!
1. Choose Your Font
Start by selecting a font style that works well with the wavy text effect. Kittl offers a range of wavy text fonts, including some that give off a retro vibe. We suggest choosing a font with thicker lettering. This will create a more visually striking and readable design once you stack the text and apply the wavy effect.
Browse our list of retro fonts that you can use for this retro wavy text project with styles spanning from the '50s to the '90s.
2. Type Your Desired Phrase or Word
Once you have your canvas ready, locate the text tool on the left-hand side of the interface. Clicking this will bring up a text box where you can type your desired phrase or word. Whether you’re going for something short like “Groovy” or a longer phrase, Kittl handles text with precision, making it easy to manipulate.
Here’s a pro tip from Drew in his video tutorial: The shorter the word or phrase, the more prominent the wave effect will be. This is especially useful if you’re looking to create bold, impactful designs.

3. Choose a Retro Font from Kittl’s Extensive Font Library
Next, it’s time to choose a font that complements the wavy text effect. Kittl offers an extensive library of fonts, including many that lend themselves well to retro and groovy font styles. You can browse through different font categories such as retro, bold, and serif to find one that suits your design.
You'll see we opted for a bold, retro-inspired font that amplifies the effect. Choosing a font with thicker lines and distinct characteristics will make the wavy text effect more visible and striking.

4. Apply the Wave Effect Using Kittl’s Built-in Tools
This is where the magic happens! After choosing your font, it’s time to apply the wave effect. In Kittl, this is incredibly easy to do:
- Select the text you want to edit.
- On the right-hand panel, look for the transformation options, which include features like arch, distort, and wave.
- Click on the flag effect, and immediately you’ll see your text take on a flowing, undulating shape.

5. Adjust the Wave Intensity and Spacing to Achieve the Desired Look
Once the initial wave is applied, it’s time to fine-tune your design. You can control how dramatic or subtle the waves are by sliding the intensity bar left or right. Adjust the wave intensity to match the overall aesthetic of your project.
You also have control over the letter spacing. Spacing out the letters can create a more exaggerated wave, while tightening the spacing results in a subtler effect.

6. Duplicate Your Text
Once you're happy with your initial text, duplicate it, then drag and drop each copy into alignment. Repeat for as many layers as you want in your finished design. We've added five text block layers.

7. Experiment with Colors to Make Your Wavy Text Stand Out
To make your wavy text truly pop, Kittl allows you to easily adjust the color of each text block. Here are some quick tips:
- Colors: Choose bold, contrasting colors to enhance the retro look. Kittl allows you to easily change the text color, background, and even apply gradient effects for added depth.
- Shadows: Adding a drop shadow to your wavy text can create a three-dimensional effect, giving the illusion that your text is floating or popping off the page. Kittl’s text shading feature tool allows you to control the direction, opacity, and blur intensity of the shadow.
If you want to give your retro wavy text a bit of a vintage feel, Kittl has texture overlays that can add a distressed, old-school look to your design. You can also play around with borders and opacity settings to further enhance your project.

8. Add the Decoration Effect
Now is when you want to add the color cut effect - this will split your text into two different colors, top and bottom. Here's what you'll do:
- Go to decoration effects, and select the color cut effect.
- When applied, the color of the top half of your text should change to grey by default. You'll adjust this in the next step.

9. Adjust the Settings and Colors
As mentioned above, you'll notice the top half of your text turns grey when you apply the color cut feature. Here's what you'll want to do next:
- Set the default grey to your preferred color, and change your original text to 0% opacity. At this point, you should only be able to see the effect color that's applied to the top half of your text block.
- You can use the "distance" slider to adjust the "cut" placement, allowing you to control how much of the bottom half of your text is cut off - choose as much or as little as you like.

10. Repeat Steps 8 and 9
To achieve the stacked text design look, you'll need to repeat steps 7 and 8 to the rest of your text blocks (excluding the text at the bottom - keep this one whole as it's the front focal point of the design).
Once you've applied the color cut effect to word, you can easily adjust the placement of each. You want to ensure that they all line up cleanly. The flag effect you applied is helpful here, as it set the wave pattern of each to the same standard.
This will bring you to the final look as seen below!

Wavy Text Generation: Key Takeaway
Whether you're designing a poster, a logo, or social media content, mastering the wavy text effect is a must for any designer. And while many people still rely on stacking text layers, Kittl’s wavy text generator provides an easier, faster, and more flexible way to create professional designs. So, give it a try, experiment with wavy fonts, and bring some retro vibes to your next project!
If you’re interested in learning more, watch the tutorial here and see just how easy it is to get started.
Now that you know how to create wavy text, get creative and bring your designs to life with this cool, nostalgic effect!