


Product
Templates
Resources
Company
Home
Blog
Print on Demand
Print on Demand Notebook Cover | Design Tutorial
Print on Demand Notebook Cover | Design Tutorial
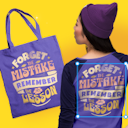
Print-on-demand is a sprawling market. Services like Teepublic, Redbubble, TeeSpring, and Society 6 allow creators to share their designs and list them for interested customers to purchase. This represents a great opportunity to get your art out there and make money from it. And if you know which designs are particularly popular and in demand, you’ll be on the right track.
This tutorial will show you how to make one of the more sought-after designs: a custom notebook cover. We’ll cover the design process in the online graphic design platform Kittl for hardcover and spiral-bound notebooks. While designing a beautiful cover may seem challenging, Kittl will make the process seamless. You can try it out right now – simply sign-up for free, grab Kittl, and follow along.
1. Customize Your Artboard Size
In your new Kittl project, click on the “Settings” cog icon. Go to “Custom Size” and enter the width and height. For this project, we’re going with the default cover size required for spiral-bound notebooks from Redbubble: 1756 x 2481 pixels.
Of course, you can create artboards of different sizes depending on your chosen print-on-demand service.

2. Take Advantage of Picture Blending Modes
To get our cover started, we’ll insert a background picture. This is done through the left sidebar. Choose “Photos” (second icon from the bottom) to browse pictures. For this cover, we’re going with a photo of clouds, so we typed in “clouds” in the search bar.
Once you’ve chosen a picture, scale it up to fill up the artboard. Now it’s time to choose a blending mode. When the picture is selected, you’ll see an “Object Settings” menu on the right with opacity, alignment, and blending mode options.
Under “Blending Mode,” you’ll see a drop-down menu. Clicking on it will show several blending choices: Normal, Color Burn, Multiply, Overlay, and Soft Light. We’ll choose Overlay.
With this blending mode, you can select a different background color. We went with a light blue to make the clouds fainter.
You’ll notice that you have two layers now – one with the background and the other with the photo. It would be a good idea to rename them so you don’t lose track of crucial layers moving forward.

Hold the “Alt” key while dragging the picture to scale it to the desired size while leaving the image centered. Alternatively, hold Shift to resize the picture while keeping one corner in the middle of the artboard.
3. Achieve a Faded Retro Look
Right now, our graphic is little more than a blown-up photo with an overlay effect. We want to make it more unique and charming with a faded effect. For that, we’ll go to the left sidebar and choose “Textures.”
We selected a marble texture and changed its opacity to 43 using the “Background Settings” menu on the right. The default blending mode “Color Burn” works perfectly here.
When you set the texture the way you want it, click on “Release Texture” to finalize the process. Once you’ve released a texture, you can add more textures. You can insert as many textures as you want and create a unique look for your design.
We then navigated to “Paper Textures” in the left menu, chose a nice retro-looking texture, and set its opacity to 60. Together with the first texture, this created a very interesting effect and made the picture look faded and weathered – of course, in a good way.

4. Create a Gorgeous Floral Frame
It’s time to make the cover livelier with some floral elements. In the left sidebar, go to “Add Elements,” navigate to the “Illustrations” tab, and find the “Vintage Flowers” category.
We’re going to add various flower elements to create a frame in front of the clouds. To group all flowers, select them and hit Ctrl + G in Windows or Cmd + G on Mac. This will put all of the selected elements in a separate layer.
Next, we returned to the “Add Elements” menu and went to the “Abstract” tab. In that menu, we looked for “Etched Clouds” and found an element that would fit the graphic nicely. We took the etched cloud, scaled it, moved it over the flowers, and changed it into a lighter color.
Then, we duplicated the cloud several times and, again, grouped the etched clouds into a single layer.

If you need to flip an element, simply right-click it and select “Flip Horizontal” or “Flip Vertical.” You’ll get an exact mirror image of the selected element.
5. Add More Visuals
We want to make our cover even richer, and we can do just that by inserting some additional elements. Of course, we’ll use the “Add Elements” menu for this.
We went for the “Vintage Insects” collection, which is under “Illustrations.” From there, we picked some butterflies and rotated them slightly to create an impression of movement.

6. Insert a Title Panel
Next, we went to the “Shapes” tab and chose a panel from the section of the same name. Panels on notebook covers are very handy since you can write your name or the subject of the notebook on them. We resized and centered the panel and made its colors lighter.
For this project, we didn’t want to leave the panel empty. Instead, we used the text tool from the left sidebar, chose the Averia Serif font, and wrote “Thoughts are free” in an all-headline style.
We tweaked the text some more, decreasing the font size and increasing the letter spacing to make it the perfect fit for the panel and the overall design. All these options are available under the “Text Settings” menu on the right side.

7. Switch to Hardback Format
With all of these elements in place, you now have a finished design for a spiral-bound notebook. But you aren’t limited to that format with Kittl – you can change it even after you’ve completed the cover design.
However, changing to the hardcover format won’t be as simple as typing in new dimensions. You’ll need to follow specific steps to make your design fit in with the cover size.
First, take a rectangle from “Basic Shapes” in the “Add Elements” menu. Stretch the rectangle until it’s over the entire graphic, making sure to align the corners. This step will help you orientate your graphic once you change the format.
Now, go to “Settings” and enter a new custom size. For a hardcover notebook on Redbubble, this will be 3643 x 2481 pixels. Hit “Confirm.” You’ll notice certain elements have shifted on the artboard – that’s why we needed the rectangle.
Before moving forward, make sure all layers are unlocked, which means you can move them around freely. You’ll determine their locked status by the padlock icon next to the layer name in the “Layers” menu.
Select everything and drag the selection until the edge of the rectangle aligns with the right edge of the artboard. Then, deselect all elements and delete the rectangle. You’ll see that the main portion of the graphic is now in the right place.
All you’ll need to do now is stretch the background cloud image and the texture layers to cover the entire artboard. Fill out the left side of the cover with more flowers and butterflies. Soon, you’ll have the complete hardcover version of your design.

Of course, this doesn’t have to be your end design. You can continue to play around in Kittl and edit and customize the design further.
