If you’re staring at your screen right now, wondering how to make money online through design business ideas, you’re not alone.
The truth is, thousands of people are turning their creativity into income every single day, and you can too. You don’t need fancy gear, a business degree, or months of waiting to start earning. You just need one powerful tool and a few smart ideas.
That’s where Kittl comes in. It’s an all-in-one design platform that lets you create, export, and sell custom products — all from your laptop.
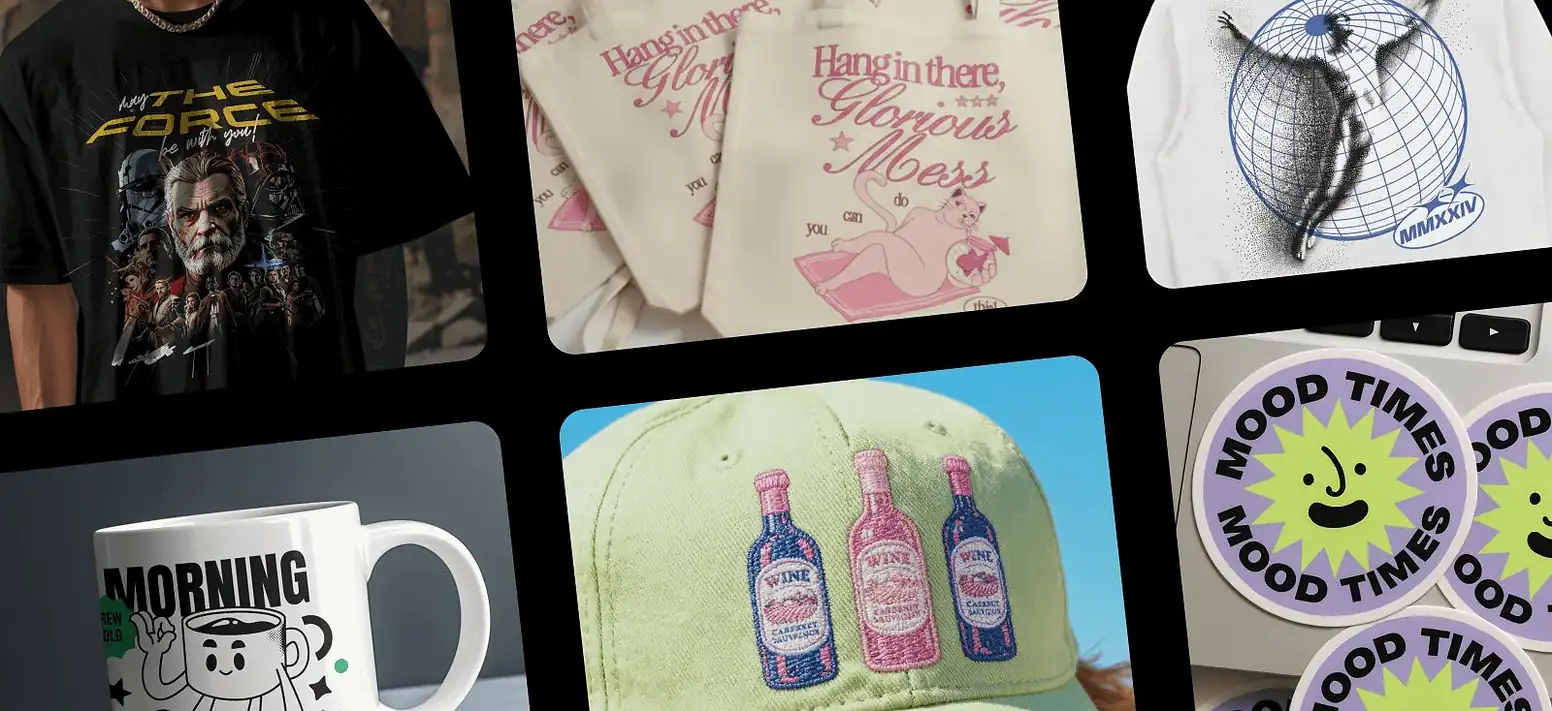
Think tote bags, hoodies, mugs, posters, and even digital downloads. You design once, and with print-on-demand (POD), the printing and shipping are handled for you. No inventory, no packing boxes, no upfront risk. Since you’ll be managing client files, payment details, and sensitive business data entirely online, it’s wise to protect your setup with reliable antivirus and VPN software from the start.
Here’s why this matters: the global print-on-demand market is growing at a compound annual growth rate (CAGR) of about 23%, according to a report by Grand View Research. That means more people are buying custom, small-business-made products than ever before — and there’s still plenty of room for new creators to profit.
So if you need an extra income stream or a way to escape the paycheck-to-paycheck cycle, this guide is your shortcut. We’ll walk through 10 easy design business ideas you can create today using Kittl to start making money online — even if you’re starting from zero.
Open Kittl, bring your ideas to life, and let’s turn your creativity into cash that actually hits your account.
1. Tote bag designs that sell year-round

Tote bags have become more than simple carry-alls. Today, they’re fashion statements, eco-conscious choices, and personal branding tools all in one.
That’s why they make such a great first product for your design business at home.
Before designing, remember that the material and print method affect how your artwork appears. As noted in a CustomCat guide, “Designing for screen is different than designing for fabric. What looks crisp on a monitor may be blurry when printed on rough canvas.”
Always check your design at full size and export it as a high-resolution PNG (300 DPI) or vector SVG for the best print clarity.
Here’s how you can design a professional tote bag using Kittl:
- Set your canvas size. Start a new project at around 14″ x 16″, the standard print area for most totes. You can adjust it later to match your print provider’s specs.
- Use bold fonts and clear shapes. Choose large display fonts from Kittl’s text library and experiment with spacing, shadows, or outlines for extra visibility. Simple compositions stand out best on textured fabric.
- Decorate with illustrations. Explore Kittl’s Illustrations and Ornaments tabs to find icons, borders, or motifs that complement your message. If you want something more artistic, browse boho tarot card style themes for inspiration. They’re trending with modern, nature-loving shoppers.
- Test color contrast with mockups. Canvas bags can mute colors slightly, so boost saturation and preview your design on realistic product mockups.
- Export your design. Save with a transparent background in PNG or SVG format so it’s ready to upload to any print-on-demand site.
Before launching, test print on a real canvas to see how colors hold up. Some materials absorb ink differently, dulling the final look.
According to Totebag Factory, choosing the wrong tote material is one of the most common mistakes that cause prints to fade after just one wash.
Lastly, treat your tote designs like a collection, not a one-off. Create seasonal or niche-based sets: floral summer totes, minimalist quote designs, or zodiac collections. Consistent styles help you attract repeat customers and build a recognizable brand presence over time.
2. T-shirt designs for every niche

T-shirts are the foundation of most print-on-demand (POD) businesses for one simple reason: everyone wears them.
They’re versatile, affordable to produce, and work across almost any niche, from motivational quotes to hobby fandoms.
The challenge isn’t making a T-shirt; it’s making one people actually want to buy. As noted by Creative Bloq, even the most striking image can lose its appeal if it’s not built with the right fabric, layout, and placement in mind.
Here’s how to create profitable, trend-aware T-shirt designs in Kittl that look great both on screen and in print.
- Start with the right canvas. In Kittl, create a new project around 12″ × 16″ at 300 DPI. This matches the standard print area for most POD suppliers. Adjust size and positioning for your layout, such as center chest, pocket print, or back design.
- Research what’s trending. Before you start designing, spend time exploring Pinterest, Etsy, and Redbubble to see what’s currently selling in your niche. Look for repeating design elements like color palettes, typography styles, or quote formats. As many POD sellers point out, success begins by understanding what’s already proven to work. You can then build your own creative spin within that framework.
- Find your niche and concept. Don’t try to please everyone. Narrow your designs to a specific audience, such as book lovers, pet owners, or coffee enthusiasts. Use Kittl’s AI Image Generator to brainstorm themed graphics or custom illustrations that fit your chosen community.
- Design with readability in mind. T-shirts are often viewed from a distance, so opt for bold fonts and clear composition. Kittl’s text library offers display fonts that pair perfectly with simple vector graphics. A POD design guide warns that using low-quality or overly detailed images can result in “prints that appear cheap and unappealing.”
- Preview with mockups. Export your Kittl design and test it using realistic product mockups to check scale, contrast, and alignment. As Creative Bloq highlights, placement issues are among the most common beginner mistakes. This step helps you see how your design interacts with fabric folds, seams, and lighting.
- Export and test print. Save your final design as a transparent PNG for direct-to-garment printing or SVG for screen printing. Keep resolution at 300 DPI to preserve detail. Always order a sample first.
3. Custom hoodie graphics for online shops

Hoodies are where comfort meets creativity. They offer more print space, higher perceived value, and an audience that spans casual wearers to streetwear enthusiasts.
Because of their versatility, hoodies often become bestsellers in any print-on-demand (POD) store. As noted in Ecompanda’s hoodie printing guide, they “provide a great surface for printing custom designs” and appeal across age groups, making them a top pick for design entrepreneurs.
Before opening your Kittl canvas, it’s worth noting what experienced creators often say about hoodie design: choose your material wisely, research your audience, and always test before listing.
Here’s how to create bold, high-quality hoodie designs in Kittl while avoiding those same mistakes.
- Choose the right hoodie style and fabric. Start by matching your design to the hoodie’s type. Pullovers, zip-ups, and cropped fits all print differently. Fabric weight and texture also matter since cotton hoodies tend to shrink more than polyester blends, as pointed out in Mock-It’s hoodie design guide. Always check the blank’s composition before setting your print dimensions.
- Define your niche and concept. Hoodies thrive on personality. Use Kittl’s templates to create designs that resonate with specific communities. Streetwear enthusiasts, outdoor adventurers, or gaming fans. The Swagify custom hoodie guide notes that choosing the right hoodie style for your target market can make or break your brand’s appeal.
- Design for the hoodie’s structure. Hoodies come with seams, pockets, and drawstrings that can distort your design if you don’t plan ahead. In Kittl, start with a canvas sized around 14″ × 18” for front prints or 15″ × 20″ for back prints. Use layers to separate illustrations, textures, and typography. Play with Text Transformations and Decoration Effects to add outlines or shadow depth to your text.
- Add textures and depth. The Background Generator in Kittl is a great way to create subtle fabric-inspired backgrounds, while textured illustrations add personality. If you want to achieve a bold, layered look, try stacking grunge textures behind your typography for a vintage or streetwear vibe.
- Preview your design with mockups. Before finalizing, export your design as a transparent PNG or SVG and place it on a realistic hoodie mockup. Seeing it on folds and seams can prevent costly print errors. As explained in Design Musketeer’s POD mistakes guide, choosing the wrong product for your design is one of the most common errors among new sellers.
- Order a test print before launch. The Printful guide on hoodie printing recommends ordering a physical sample to check color accuracy, placement, and comfort. Even slight misalignments can ruin the symmetry of your design once it’s on the fabric.
Once you’ve nailed your process, consistency becomes key. According to Printful’s report on common POD mistakes, one of the top issues creators face is designing without understanding their audience or experimenting with too many product types.
Taking time to research what styles are trending in your niche on platforms like Pinterest, Etsy, or even TikTok, can help you design what customers actually want.
4. Printable wall art and posters for digital download

Printable wall art and posters are digital, so there’s no shipping or inventory, and buyers can download instantly (which means you can make sales while you sleep).
People are constantly searching for affordable, printable art to decorate their homes or offices without waiting for shipping.
But how do you create printable wall art in Kittl that looks premium and sells well on platforms like Etsy, Gumroad, or your personal shop?
- Set your file dimensions. Start by opening a new Kittl project sized for standard print ratios. For example, 4:5 (8×10 in), 3:4 (12×16 in), or 2:3 (16×24 in). These common formats make it easy for customers to print at home or in local shops.
- Design with typography and balance. Text-based art sells consistently because it’s emotional, universal, and fits any decor. Use Kittl’s text library to pair bold serif fonts with soft script or handwritten fonts. Add subtle design accents using elements from the Ornaments and Illustrations tabs.
- Add background textures or gradients. Subtle grain or paper textures give digital art a more tangible feel. In Kittl, use the Textures or Background Generator tools to layer depth and warmth. Minimal doesn’t have to mean flat.
- Use quotes and themes that connect. Before designing, browse Pinterest or Etsy for trending keywords like “affirmations,” “mid-century wall art,” or “boho minimal prints.” This ensures your designs resonate with what buyers are already searching for.
- Export high-quality files. Save your design as a high-resolution PDF (300 DPI) for printing and a JPEG or PNG for online previews. Offer multiple sizes in one ZIP file so buyers get more value from one purchase.
Finally, always showcase your work using styled mockups. You can use mockups to show how your art looks framed, above a couch, or in a workspace — making it easy for shoppers to picture it in their own space.
5. Sticker packs and decals for creative fans

Stickers are small, affordable, and addictive. People rarely buy just one.
For you, that means repeat customers and a steady stream of micro-sales that can add up quickly. Stickers remain one of the top-selling POD items year after year because they’re cheap to produce, collectible, and easy to ship.
The secret to design high-quality, cut-ready stickers in Kittl that stand out on Etsy, Redbubble, or even local markets is simple:
- Set up your canvas. Open a new Kittl file at around 8.5″ × 11″ if you’re creating a sheet of stickers or 3″ × 3″ for single designs. Keep the background white to visualize your layout clearly.
- Use vector elements for crisp edges. Stickers need clean lines that print sharply, especially for Cricut or Silhouette cutting machines. In Kittl, select vector illustrations from the Elements or Illustrations tab, or create your own by tracing shapes. Avoid soft shadows or blurry effects since these don’t translate well on die-cut edges.
- Add outlines for cut guides. Use Kittl’s Pen tool to add a white or light-colored border around your design. This serves as your “kiss-cut” margin — the area cutting machines recognize for precision trimming.
- Design around themes. Stickers sell best when they belong to a niche. Think plants, animals, affirmations, gamer icons, or cozy aesthetic packs. Browse Pinterest or Etsy for what’s trending and make cohesive sets of 6–12 designs that customers can mix and match.
- Export for production. Save your designs as transparent PNGs (300 DPI) for print-on-demand sites or SVGs if you’re selling to Cricut users. Keep margins even and add bleed areas if your print partner requires them.
Once you have your first pack, upload it to Etsy or Redbubble and experiment with bundle pricing. For example, 3 packs for $10 or 5 for $15. Stickers perform well because they trigger impulse purchases, especially when bundled or themed.
If you want to reach beyond online sales, test printing with a local supplier or use a POD service that offers vinyl finishes. Many creators find early success selling small sticker sheets at markets or conventions, then scale online after building a following.
6. Mug and cup designs for print-on-demand

Birthdays, holidays, office parties — there’s always a reason someone wants a mug. And if you can design one that feels personal, you can sell it all year long. They’re small, affordable, and quick to design.
Here’s how to create mug designs in Kittl that are print-ready, visually balanced, and easy to sell across multiple platforms.
- Set your canvas for wraparound designs. Most 11 oz mugs have a printable area of roughly 8.5″ × 3.5″. Create a Kittl canvas with those dimensions, ensuring you leave a half-inch of bleed space on both ends for safety. This lets your design wrap smoothly around the mug without awkward gaps.
- Use curved text for flow. Mugs are cylindrical, which means straight text can look distorted once printed. Kittl’s Text Transformation tools let you curve your typography along an arc, giving your design a natural wraparound effect. Use short quotes or one-liners that read easily from either side.
- Add simple graphics with meaning. Pair your text with small icons, illustrations, or accents from Kittl’s Elements tab. Keep your visuals bold and high-contrast — fine lines may not print well on glossy ceramic. A Printify tutorial recommends sticking to two or three colors to ensure sharpness and avoid fading.
- Preview your wraparound on mockups. Export your design as a transparent PNG and test it using a realistic mockup to ensure spacing feels right. Check that text sits at least one inch away from each edge, so handles don’t interrupt the layout.
- Export and upload to your POD site. Once your design looks balanced, export it as a transparent PNG (300 DPI). Upload to your preferred POD platform, such as Printify, Printful, or Gelato, and apply it to different mug models and color variations to expand your listing catalog.
To stand out, think in themes. Create collections like “Coffee & Confidence,” “Pet Parent Club,” or “Cozy Morning Quotes.” Bundling similar designs helps you appeal to repeat buyers and improves search visibility on Etsy or Redbubble.
Finally, showcase your mugs with lifestyle photos: someone holding it by a window, sitting on a desk, or surrounded by cozy props. Mockups work everytime.
7. Hat and cap embroidery-ready designs

Embroidery-ready hat designs are an often-overlooked opportunity in print-on-demand (POD).
They require precision, but when done right, they command higher prices and attract loyal customers. Plus, embroidery hats have higher retail value and long-lasting quality.
Whether it’s for sports teams, local businesses, or fashion-inspired collections, embroidered caps have a timeless appeal: durable, textured, and premium-looking.
Here’s how to design embroidery-ready hats using Kittl, ensuring your artwork stays crisp and stitchable:
- Start with a small, focused canvas. Create a new Kittl project sized around 4″ × 2″. This approximates the embroidery area on most caps. Center your artwork and keep key details within the middle zone to prevent distortion on curved hat surfaces.
- Use bold, minimal shapes. Embroidery doesn’t handle gradients, tiny lines, or complex textures well. Stick to solid fills and simple icons from Kittl’s Illustrations or Elements tabs. Thin lines and small letters under 0.05 inches may not stitch correctly, so thicker, bolder lines will give better results.
- Focus on typography. Text-based embroidery is a classic approach. Think initials, short slogans, or monograms. Kittl’s typography engine allows you to adjust letter spacing, height, and stroke weight for perfect legibility. Avoid thin scripts and use fonts with strong geometry, such as sans-serifs or varsity styles.
- Apply contrasting colors. Since embroidery uses thread, your color palette is limited. Stick to 2–3 high-contrast colors, like cream on navy or black on beige. Test combinations using Kittl’s Project Colors feature for quick visualization.
- Export as SVG for precision. When you’re ready to send your design to a POD provider or embroiderer, export it as an SVG (vector) file. This ensures your lines remain scalable and accurate when converted into stitch patterns. The Custom Ink embroidery overview notes that vector files are essential because they translate cleanly into embroidery machine formats without loss of detail.
Once your test print passes, you can scale quickly. Offer your designs on different cap types: dad hats, trucker caps, beanies, or snapbacks, since each attracts a different audience.
8. Greeting cards and invitations for every occasion

Few design products sell emotion as effectively as greeting cards.
Whether it’s a wedding invitation, a birthday card, or a digital thank-you note, people are always looking for thoughtful designs that feel personal. Especially if they can download and print them instantly.
That makes greeting cards one of the most evergreen and beginner-friendly products for designers working from home.
Consumers increasingly buy printable or digital cards online, especially through Etsy and small design shops. These versions are faster, cheaper, and more sustainable than store-bought cards — giving independent designers a clear advantage.
But how do you create beautiful, print-ready cards in Kittl?
- Choose your format and size. Start a new Kittl project using a standard card dimension such as 5″ × 7″ for folded cards or 4″ × 6″ for flat postcards. For digital invites or e-cards, you can also use a 1080 × 1920 px layout that works well for phones and Instagram Stories.
- Combine decorative fonts and elements. Browse Kittl’s Text Library for elegant script or serif fonts. Then, layer in icons and illustrations from the Ornaments or Illustrations tabs. Florals for weddings, balloons for birthdays, or minimalist motifs for thank-you cards. Mixing typography and subtle visuals keeps your design engaging without clutter.
- Add textures for warmth. Cards that look tactile tend to sell better. Use Kittl’s Textures or Background Generator to add watercolor washes, paper grain, or gradient fades. These small touches give your card depth and a handcrafted feel.
- Leave editable space. If you’re selling templates, keep placeholder text for names, dates, or short messages so buyers can customize easily. Sellers on Etsy report higher conversion rates for editable templates, since customers appreciate flexibility without hiring a designer.
- Export high-quality formats. Save printables as PDF (300 DPI) with bleed margins for trimming, and digital invites as JPEGs or PNGs in mobile-friendly ratios. Offer both options in a ZIP folder for added value.
9. Social media graphics and online banners for clients

Every business today needs a social presence. But not every business owner has the time or skill to design content consistently. That gap is where you, as a designer, can step in.
Social media graphics, ad banners, and profile visuals are among the most in-demand freelance services in the online economy, especially for small businesses and content creators who post daily.
Social media design is one of the top 10 fastest-growing freelance skills, and small business marketing spend continues to rise. Businesses now invest heavily in content that looks polished and on-brand.
It’s a perfect opportunity for Kittl users who can design clean, customizable visuals in minutes.
Here’s how to design professional social media graphics and banners using Kittl:
- Start with the right dimensions. Open a new Kittl project using platform-specific sizes. For Instagram, use 1080 × 1350 px for portrait posts (the current best-performing size), 1080 × 1080 px for square posts, and 1080 × 1920 px for Stories or Reels covers. For YouTube banners, set your canvas to 2560 × 1440 px, and for Facebook ads, use 1200 × 628 px. You can also create multiple layouts from one design using Kittl’s Infinite Canvas feature, allowing you to adapt your visuals across platforms without rebuilding each one from scratch.
- Build around brand consistency. Every client wants cohesive visuals. Use Kittl’s Project Colors to define brand palettes and Typography Sets for recurring fonts. This helps you deliver reusable templates that clients can update later — something many designers charge extra for.
- Use elements that align with purpose. Explore the Illustrations, Abstracts, and Ornaments tabs in Kittl to find vector shapes and textures that fit the client’s tone — playful for lifestyle brands, clean for tech companies, or elegant for boutiques. Avoid overcrowding the layout; let the message breathe.
- Add readable text hierarchy. Headlines should pop even on mobile screens. Use bold display fonts for titles and lighter sans-serifs for captions. Posts with clear visual hierarchy increase engagement rates, as users process bold typography 70% faster than body text.
- Show your work with mockups. After designing, export your visuals as transparent PNGs or JPGs (300 DPI) and place them in social media mockups. A strong presentation helps clients imagine the posts in action, boosting your perceived professionalism and conversion rate.
To find clients, reach out directly to small brands, influencers, or Etsy sellers whose visuals look inconsistent. Offer a sample post or banner based on their existing style to demonstrate what better branding could look like.
Even one satisfied client can lead to ongoing work, referrals, or retainers.
10. Digital planners, templates, and covers

If you’re looking for a sustainable, high-demand digital product, planners and templates are one of the most profitable categories on Etsy and Gumroad.
They appeal to students, entrepreneurs, and productivity enthusiasts — anyone looking to stay organized in a more aesthetic, personalized way.
Here’s how to design customizable planners, covers, and inserts in Kittl that are ready for digital download or printing:
- Set your page size. Open a new Kittl file and create your layout at standard paper dimensions like 8.5″ × 11″ (US Letter) or A4 (210 × 297 mm). For digital-use planners, you can also design in tablet-friendly sizes, such as 1600 × 1200 px for iPads.
- Design a consistent layout. Use Kittl’s Guides and Grid System to keep margins even and spacing uniform across pages. Create a visual structure for your planner — monthly calendars, weekly spreads, task lists, or goal trackers. A consistent layout helps users stay organized and makes your template look professional.
- Combine fonts and icons for clarity. Pick clean, legible fonts from Kittl’s Text Library and pair them with minimal icons from Elements to label sections like “To-Do,” “Notes,” or “Priorities.” Use a single accent color for key highlights to maintain visual harmony.
- Create matching covers and inserts. People love cohesive design sets. Use Kittl’s Background Generator to add soft gradients, paper textures, or color patterns. Matching covers, dividers, and inserts give your planner a premium look — and increase your listing’s perceived value.
- Export multi-page PDFs. Once your pages are complete, download each as a high-resolution PDF (300 DPI), then compile them into a single file. Multi-page PDFs make your planners easier to sell on Etsy or Gumroad since buyers can use them immediately after download.
Key takeaways for your Kittl design business ideas
Making money online is about turning your creativity into consistent action. Design is one of the few skills that can generate quick results with low upfront costs and long-term potential.
You can start with stickers, planners, or social media graphics. But remember, every product you create builds momentum. The key is to start now and focus on progress over perfection.
- Start small, start today. Pick one idea, maybe a tote bag, a printable planner, or a T-shirt. Then, design your first product in Kittl. Don’t wait for the perfect niche; let experience guide you.
- Use data to design smarter. Browse Etsy, Pinterest, or Redbubble to see what’s already selling. Create your own version with better visuals, cleaner typography, or a stronger message.
- Focus on reusability. Design templates, planners, or assets that can sell repeatedly without extra work. These are your long-term income drivers.
- Test and improve. Order samples, post mockups, and get feedback. Each revision moves you closer to what people actually want to buy.
- Build consistency. Upload regularly, refine your listings, and share your designs online. Consistency compounds faster than creativity alone.
- Leverage Kittl’s strengths. Use its AI tools, vector editor, and mockup previews to create professional-quality designs quickly — saving hours and boosting your output.
At its core, success in design is about creating visuals that people connect with. The more value you create, the more your earnings grow. And often faster than you think.
So open Kittl, pick one path from this guide, and take the first step. Every designer you admire started with one upload, one mockup, or one client.
This is how you make money online. By turning your ideas into something real today.